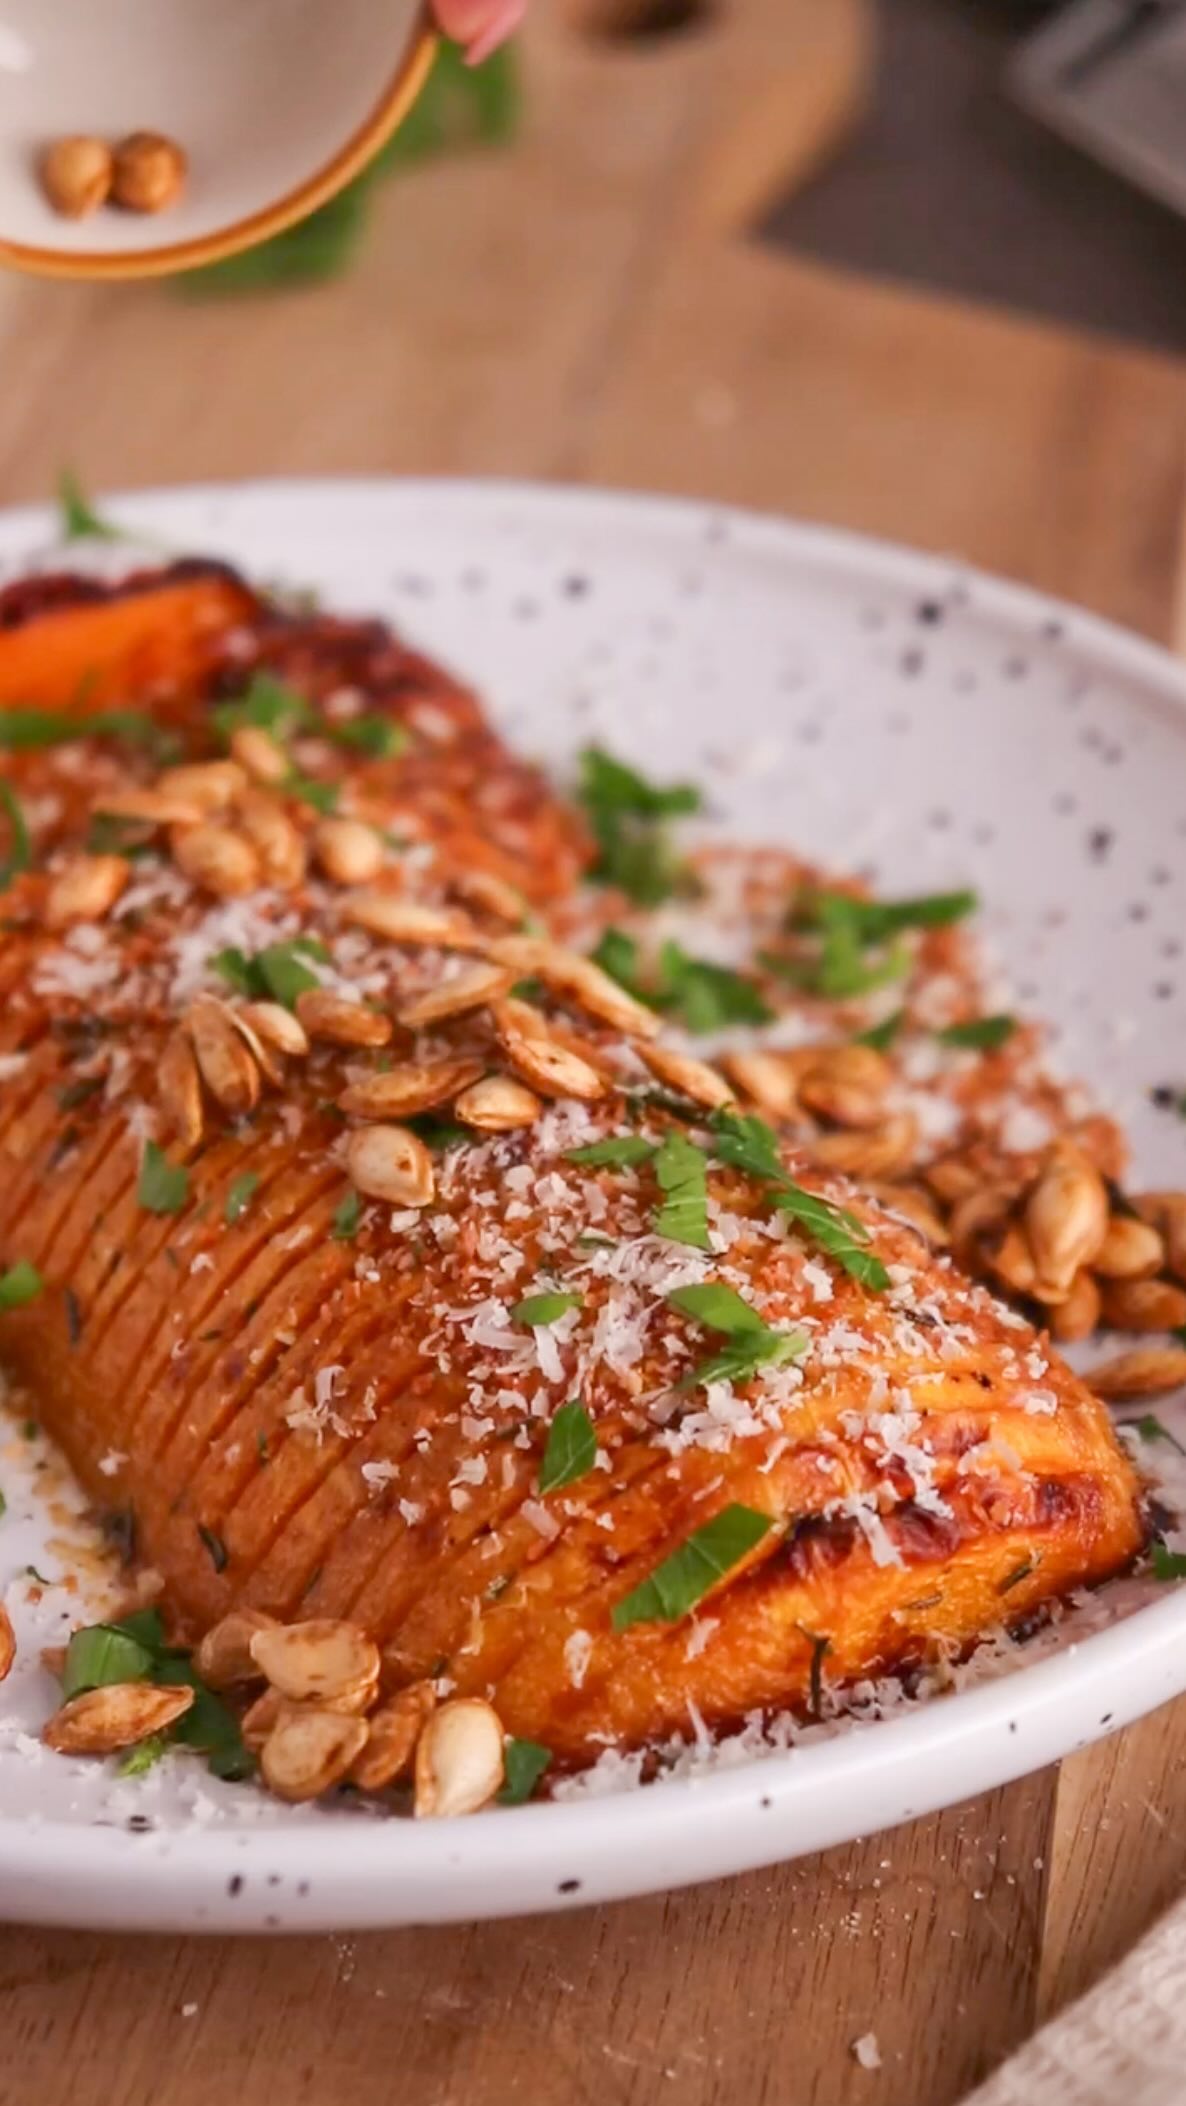
Swedish Hasselback technique from a 1953 Stockholm restaurant now slices squash instead of potatoes, letting butter pool between every roasted fold.
Butternut Hasselback for Autumn
Dive into the flavors of fall with this irresistible Butternut Hasselback dish! With just five minutes of prep, you'll transform tender butternut squash into a stunning centerpiece, beautifully roasted with fragrant herbs and a drizzle of olive oil. Let the oven work its magic while you savor the cozy aromas filling your kitchen!
Prep
5
min
Cook
45
min
Serves
2
people
Level
beginner
The Story
The hasselback technique didn't start with squash at all—Stockholm's Hasselbacken restaurant invented those precision slits for potatoes back in 1953, and some clever vegetarian in the 2010s nicked the idea, swapped in butternut, and basically gave Sweden's most fiddly potato trick a second life as autumn's answer to roast dinner, minus the dead animal.
Regional Twist
Up in Quebec, they'd ditch the Parmesan for aged cheddar and stir maple syrup into the olive oil marinade before roasting, because nobody in Montreal trusts a squash dish that hasn't been properly Canadianised with something sticky and amber-coloured.
📝 Ingredients
Serves 2🥬Fresh Produce(3)
- 1 butternut
- A few sprigs of fresh parsley
- Pepper
🥛Dairy & Eggs(1)
- Parmesan, to tasteoptionalcan be replaced with feta
🫙Pantry Staples(2)
- 30 g of breadcrumbs (1.06 oz)
- 2 tablespoons of olive oil (30 ml)
🧂Spices & Seasonings(4)
- Garlic powder
- Paprika
- Salt
- Thyme or herbs de Provence
Nutrition (per serving)
Calories
421
Protein
10g
Carbs
66g
Fat
18g
👨🍳 Instructions
- 1
Peel the butternut, cut it in half, and remove the seeds. Do not throw away the seeds!
- 2
Make slits along the butternut without cutting all the way through, in a hasselback style. You can place two chopsticks on each side to avoid cutting it in half.
- 3
Mix the olive oil, garlic powder, paprika, thyme, salt, and pepper, then generously brush the butternut with this mixture.
- 4
Bake at 200°C (about 400°F) for 40 to 45 minutes, until it is golden and tender.
- 5
Meanwhile, clean the seeds, season them with a bit of olive oil, paprika, salt, and pepper, then bake them in the oven with the butternut. Keep an eye on them and remove them as soon as they are crispy to avoid burning.
- 6
For extra crunch, toast the breadcrumbs in a pan with a bit of thyme, salt, and pepper for one minute.
- 7
When the butternut is tender, add the Parmesan, parsley, toasted breadcrumbs, and crispy seeds.
- 8
Serve as is or as a side dish with roasted chicken or any other dish you have on hand.
💡 Pro Tips
- ✓Cut butternut slices to exactly 1/4-inch thickness using chopsticks as guides because thinner slices (under 1/8-inch) collapse during roasting, while thicker slices (over 3/8-inch) won't caramelize properly in 40-45 minutes.technique1/4-inch thickness
- ✓Brush the oil mixture into slits immediately after cutting, not before, because butternut's exposed flesh oxidizes and develops a protective layer that prevents oil penetration and seasoning absorption.timingApply within 2 minutes of slicing
- ✓Roast seeds at 325°F (163°C) separately on a lower oven rack, 10 minutes longer than the butternut, because their smaller surface area and lower water content require slower, gentler heat to reach crispness without burning.equipment325°F|lower rack|+10 minutes
- ✓Toast breadcrumbs in a dry pan at medium-high heat (350°F) for exactly 90 seconds, stirring constantly, because butternut's starch-heavy texture requires crumbs with 8-10% moisture reduction to create textural contrast without becoming charred or bitter.timing90 seconds|medium-high heat
- ✓Add Parmesan (grated to 1/16-inch) and breadcrumbs only after plating, not during roasting, because Parmesan's milk solids burn above 350°F and breadcrumbs lose crispness in ambient moisture within 3 minutes of the butternut's residual steam.techniqueAdd post-roast only
Share this recipe
Prep
5
min
Cook
45
min
Serves
2
people
Level
beginner
Share this recipe
Swedish Hasselback technique from a 1953 Stockholm restaurant now slices squash instead of potatoes, letting butter pool between every roasted fold.
Butternut Hasselback for Autumn
Dive into the flavors of fall with this irresistible Butternut Hasselback dish! With just five minutes of prep, you'll transform tender butternut squash into a stunning centerpiece, beautifully roasted with fragrant herbs and a drizzle of olive oil. Let the oven work its magic while you savor the cozy aromas filling your kitchen!
The Story
The hasselback technique didn't start with squash at all—Stockholm's Hasselbacken restaurant invented those precision slits for potatoes back in 1953, and some clever vegetarian in the 2010s nicked the idea, swapped in butternut, and basically gave Sweden's most fiddly potato trick a second life as autumn's answer to roast dinner, minus the dead animal.
Regional Twist
Up in Quebec, they'd ditch the Parmesan for aged cheddar and stir maple syrup into the olive oil marinade before roasting, because nobody in Montreal trusts a squash dish that hasn't been properly Canadianised with something sticky and amber-coloured.
📝 Ingredients
Serves 2🥬Fresh Produce(3)
- 1 butternut
- A few sprigs of fresh parsley
- Pepper
🥛Dairy & Eggs(1)
- Parmesan, to tasteoptionalcan be replaced with feta
🫙Pantry Staples(2)
- 30 g of breadcrumbs (1.06 oz)
- 2 tablespoons of olive oil (30 ml)
🧂Spices & Seasonings(4)
- Garlic powder
- Paprika
- Salt
- Thyme or herbs de Provence
Nutrition (per serving)
Calories
421
Protein
10g
Carbs
66g
Fat
18g
👨🍳 Instructions
- 1
Peel the butternut, cut it in half, and remove the seeds. Do not throw away the seeds!
- 2
Make slits along the butternut without cutting all the way through, in a hasselback style. You can place two chopsticks on each side to avoid cutting it in half.
- 3
Mix the olive oil, garlic powder, paprika, thyme, salt, and pepper, then generously brush the butternut with this mixture.
- 4
Bake at 200°C (about 400°F) for 40 to 45 minutes, until it is golden and tender.
- 5
Meanwhile, clean the seeds, season them with a bit of olive oil, paprika, salt, and pepper, then bake them in the oven with the butternut. Keep an eye on them and remove them as soon as they are crispy to avoid burning.
- 6
For extra crunch, toast the breadcrumbs in a pan with a bit of thyme, salt, and pepper for one minute.
- 7
When the butternut is tender, add the Parmesan, parsley, toasted breadcrumbs, and crispy seeds.
- 8
Serve as is or as a side dish with roasted chicken or any other dish you have on hand.
💡 Pro Tips
- ✓Cut butternut slices to exactly 1/4-inch thickness using chopsticks as guides because thinner slices (under 1/8-inch) collapse during roasting, while thicker slices (over 3/8-inch) won't caramelize properly in 40-45 minutes.technique1/4-inch thickness
- ✓Brush the oil mixture into slits immediately after cutting, not before, because butternut's exposed flesh oxidizes and develops a protective layer that prevents oil penetration and seasoning absorption.timingApply within 2 minutes of slicing
- ✓Roast seeds at 325°F (163°C) separately on a lower oven rack, 10 minutes longer than the butternut, because their smaller surface area and lower water content require slower, gentler heat to reach crispness without burning.equipment325°F|lower rack|+10 minutes
- ✓Toast breadcrumbs in a dry pan at medium-high heat (350°F) for exactly 90 seconds, stirring constantly, because butternut's starch-heavy texture requires crumbs with 8-10% moisture reduction to create textural contrast without becoming charred or bitter.timing90 seconds|medium-high heat
- ✓Add Parmesan (grated to 1/16-inch) and breadcrumbs only after plating, not during roasting, because Parmesan's milk solids burn above 350°F and breadcrumbs lose crispness in ambient moisture within 3 minutes of the butternut's residual steam.techniqueAdd post-roast only