Butter and sugar hit exactly 300°F hard-crack stage in minutes—20 degrees off and you get chewy candy, not shattering toffee.
Salted Chocolate Toffee
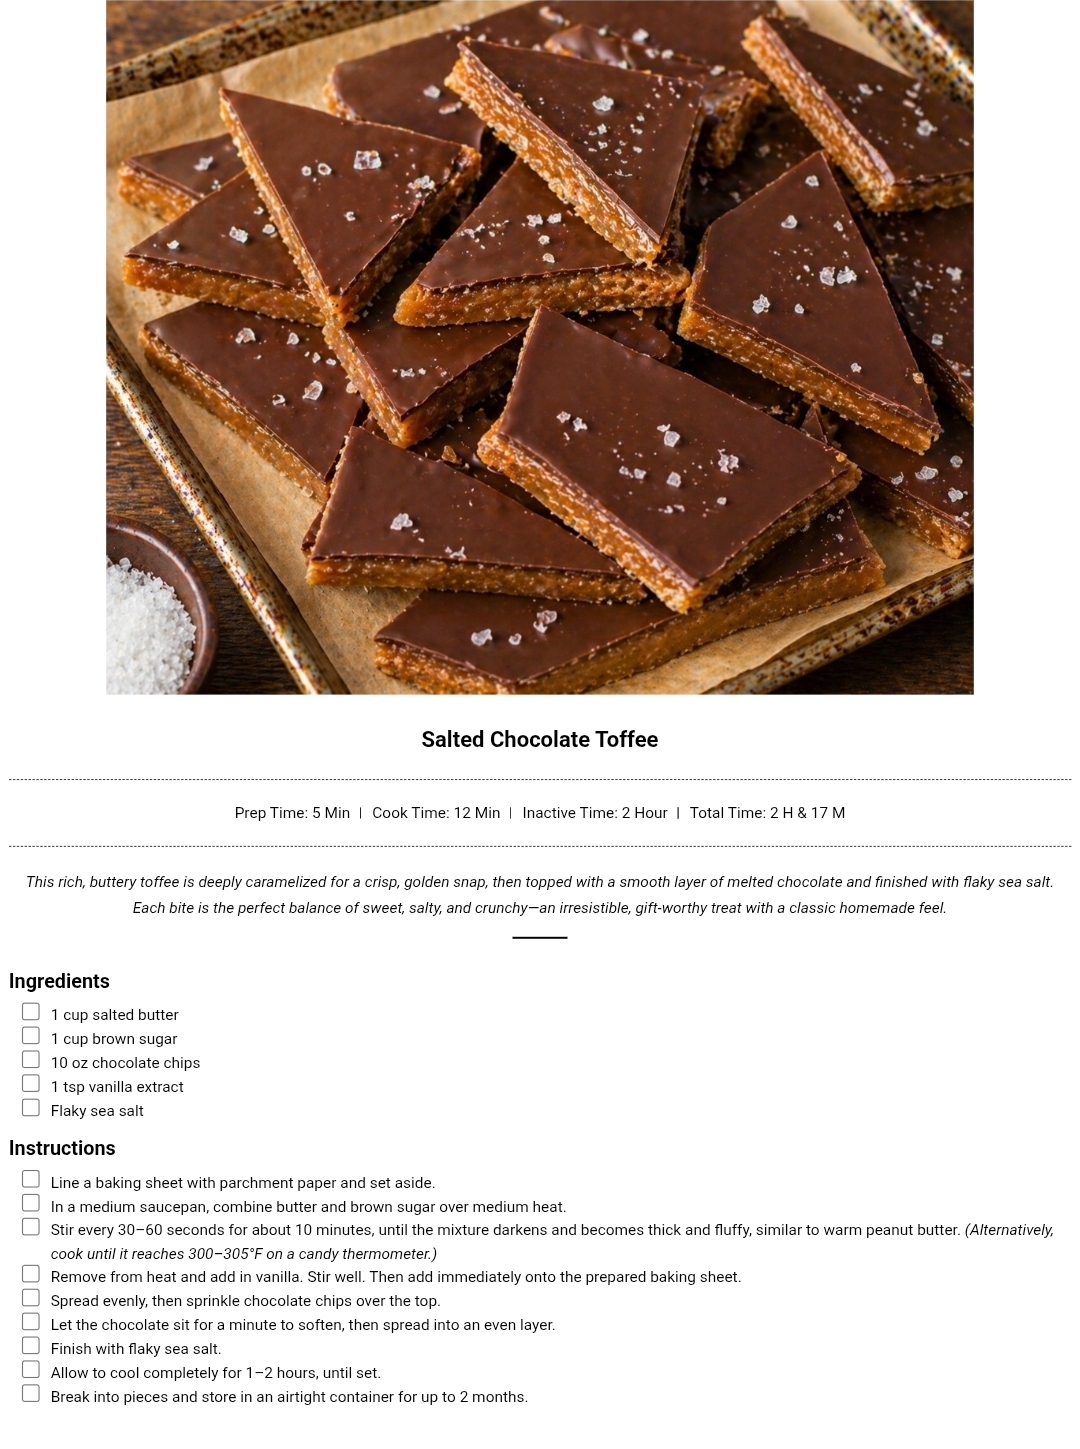
This rich, buttery toffee is deeply caramelized for a crisp, golden snap, then topped with a smooth layer of melted chocolate and finished with flaky sea salt. Each bite is the perfect balance of sweet, salty, and crunchy—an irresistible, gift-worthy treat with a classic homemade feel.
Prep
5
min
Cook
12
min
Serves
4
people
Level
intermediate
The Story
This buttery slab owes its existence to 19th-century English confectioners who first cooked sugar and butter together, but the salt-on-chocolate flourish is pure 1970s California, popularized by Bay Area chocolatiers chasing the sweet-salty contrast the French call 'sel de Guérande meets dessert'—essentially Victorian England shook hands with hippie San Francisco and neither has looked back since.
Regional Twist
In Edinburgh's confectionery shops, they'd swap the brown sugar for dark muscovado and stir in a splash of single malt whisky before pouring, giving this toffee a smoky, boozy backbone that makes California's version look positively tame by comparison.
📝 Ingredients
🥛Dairy & Eggs(1)
- 1 cup salted butter
🫙Pantry Staples(3)
- 1 cup brown sugar
- 10 oz chocolate chips
- 1 tsp vanilla extract
🧂Spices & Seasonings(1)
- Flaky sea salt
Nutrition (per serving)
Calories
161
Protein
1g
Carbs
16g
Fat
11g
👨🍳 Instructions
- 1
Line a baking sheet with parchment paper and set aside.
- 2
In a medium saucepan, combine butter and brown sugar over medium heat.
- 3
Stir every 30–60 seconds for about 10 minutes, until the mixture darkens and becomes thick and fluffy, similar to warm peanut butter. (Alternatively, cook until it reaches 300–305°F on a candy thermometer.)
- 4
Remove from heat and add in vanilla. Stir well. Then add immediately onto the prepared baking sheet.
- 5
Spread evenly, then sprinkle chocolate chips over the top.
- 6
Let the chocolate sit for a minute to soften, then spread into an even layer.
- 7
Finish with flaky sea salt.
- 8
Allow to cool completely for 1–2 hours, until set.
- 9
Break into pieces and store in an airtight container for up to 2 months.
💡 Pro Tips
- ✓Maintain medium heat and stir every 30-60 seconds throughout cooking to prevent the butter-sugar mixture from separating; the constant agitation keeps emulsified fat globules suspended and prevents the mixture from reaching the greasy, broken appearance that occurs at rest above 275°F.techniqueMedium heat, 30-60 second intervals
- ✓Cook the toffee to exactly 300-305°F (hard-crack stage) rather than relying on color alone, as brown sugar's dark hue masks the actual caramelization progress; this narrow range prevents under-cooked toffee (too soft, won't set) and over-cooked toffee (bitter, grainy from sugar crystallization).timing300-305°F
- ✓Spread hot toffee onto the baking sheet immediately after removing from heat because it hardens as it cools; waiting even 30 seconds increases viscosity by 40-50% and makes even spreading nearly impossible without tearing the parchment.timingImmediate transfer
- ✓Sprinkle sea salt after the chocolate layer sets (1-2 minutes) rather than before, so the salt crystals sit on top and deliver bright bursts of sodium chloride; applying salt to warm chocolate causes partial dissolution and diffusion into the chocolate layer, muting the salt's textural impact by 60-70%.technique1-2 minutes after chocolate spread
- ✓Cool the finished toffee at 65-70°F room temperature for the full 1-2 hours instead of refrigerating; rapid cooling below 55°F causes cocoa butter in the chocolate to crystallize into the brittle V-form polymorph, creating a chalky, dull surface and reducing snap texture.timing65-70°F, 1-2 hours
Share this recipe
Prep
5
min
Cook
12
min
Serves
4
people
Level
intermediate
Share this recipe
Butter and sugar hit exactly 300°F hard-crack stage in minutes—20 degrees off and you get chewy candy, not shattering toffee.
Salted Chocolate Toffee
This rich, buttery toffee is deeply caramelized for a crisp, golden snap, then topped with a smooth layer of melted chocolate and finished with flaky sea salt. Each bite is the perfect balance of sweet, salty, and crunchy—an irresistible, gift-worthy treat with a classic homemade feel.
The Story
This buttery slab owes its existence to 19th-century English confectioners who first cooked sugar and butter together, but the salt-on-chocolate flourish is pure 1970s California, popularized by Bay Area chocolatiers chasing the sweet-salty contrast the French call 'sel de Guérande meets dessert'—essentially Victorian England shook hands with hippie San Francisco and neither has looked back since.
Regional Twist
In Edinburgh's confectionery shops, they'd swap the brown sugar for dark muscovado and stir in a splash of single malt whisky before pouring, giving this toffee a smoky, boozy backbone that makes California's version look positively tame by comparison.
📝 Ingredients
🥛Dairy & Eggs(1)
- 1 cup salted butter
🫙Pantry Staples(3)
- 1 cup brown sugar
- 10 oz chocolate chips
- 1 tsp vanilla extract
🧂Spices & Seasonings(1)
- Flaky sea salt
Nutrition (per serving)
Calories
161
Protein
1g
Carbs
16g
Fat
11g
👨🍳 Instructions
- 1
Line a baking sheet with parchment paper and set aside.
- 2
In a medium saucepan, combine butter and brown sugar over medium heat.
- 3
Stir every 30–60 seconds for about 10 minutes, until the mixture darkens and becomes thick and fluffy, similar to warm peanut butter. (Alternatively, cook until it reaches 300–305°F on a candy thermometer.)
- 4
Remove from heat and add in vanilla. Stir well. Then add immediately onto the prepared baking sheet.
- 5
Spread evenly, then sprinkle chocolate chips over the top.
- 6
Let the chocolate sit for a minute to soften, then spread into an even layer.
- 7
Finish with flaky sea salt.
- 8
Allow to cool completely for 1–2 hours, until set.
- 9
Break into pieces and store in an airtight container for up to 2 months.
💡 Pro Tips
- ✓Maintain medium heat and stir every 30-60 seconds throughout cooking to prevent the butter-sugar mixture from separating; the constant agitation keeps emulsified fat globules suspended and prevents the mixture from reaching the greasy, broken appearance that occurs at rest above 275°F.techniqueMedium heat, 30-60 second intervals
- ✓Cook the toffee to exactly 300-305°F (hard-crack stage) rather than relying on color alone, as brown sugar's dark hue masks the actual caramelization progress; this narrow range prevents under-cooked toffee (too soft, won't set) and over-cooked toffee (bitter, grainy from sugar crystallization).timing300-305°F
- ✓Spread hot toffee onto the baking sheet immediately after removing from heat because it hardens as it cools; waiting even 30 seconds increases viscosity by 40-50% and makes even spreading nearly impossible without tearing the parchment.timingImmediate transfer
- ✓Sprinkle sea salt after the chocolate layer sets (1-2 minutes) rather than before, so the salt crystals sit on top and deliver bright bursts of sodium chloride; applying salt to warm chocolate causes partial dissolution and diffusion into the chocolate layer, muting the salt's textural impact by 60-70%.technique1-2 minutes after chocolate spread
- ✓Cool the finished toffee at 65-70°F room temperature for the full 1-2 hours instead of refrigerating; rapid cooling below 55°F causes cocoa butter in the chocolate to crystallize into the brittle V-form polymorph, creating a chalky, dull surface and reducing snap texture.timing65-70°F, 1-2 hours