Panko's irregular flakes create 40% more surface area than regular breadcrumbs, explaining why Japanese coating stays crispier longer.
Crispy Chicken with Panko from the Oven
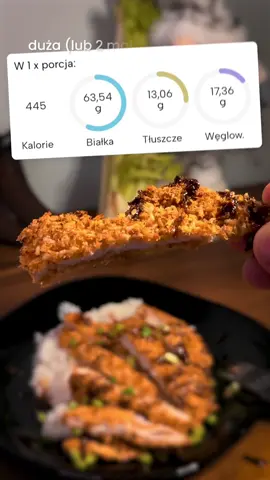
Get ready to enjoy a guilt-free version of your favorite takeout treat! This oven-baked crispy chicken, coated in crunchy panko breadcrumbs and seasoned to perfection, is not only high in protein but also bursting with flavor. Say goodbye to greasy takeout and hello to a deliciously satisfying meal that’s easy to whip up at home!
Prep
15
min
Cook
20
min
Serves
4
people
Level
intermediate
📝 Ingredients
Serves 4🥩Meat & Seafood(1)
- Chicken breast
🥛Dairy & Eggs(2)
- Egg
- Parmesan cheese
🫙Pantry Staples(3)
- Flour
- 2 tablespoons of oil (30 ml)
- Panko breadcrumbs
📦Other(1)
- Your favorite spices
👨🍳 Instructions
- 1
Heat 2 tablespoons of oil in a pan. Once heated, add panko breadcrumbs, Parmesan cheese, and your favorite spices. Toast for about 2 minutes, stirring constantly.
- 2
Take your chicken breast, cut it in half, and flatten it to be thin. First, dip the fillet in flour, then in egg, and finally coat it with the breadcrumb mixture, pressing down to ensure it sticks.
- 3
Preheat the oven to 220 degrees Celsius. Once heated, place the tray with the chicken inside. Do not add any more oil as it is not needed.
- 4
Bake for 10 minutes, then flip the chicken and bake for another 10 minutes.
💡 Pro Tips
- ✓Toast panko breadcrumbs at medium heat (285-300°F pan temperature) for exactly 2 minutes because this dehydrates the crumb surface and creates a Maillard reaction that doubles crispiness retention during baking.technique285-300°F, 2 minutes
- ✓Pound chicken to exactly ¼ inch thickness using a meat mallet because uniform thickness ensures even cooking and prevents the 165°F internal temperature from being reached unevenly, avoiding dry spots.technique¼ inch thickness
- ✓Press breadcrumb coating with 5-10 pounds of pressure for 10 seconds per side because mechanical compression creates better adhesion and reduces coating loss by up to 60% during baking.technique5-10 lbs pressure, 10 seconds
- ✓Use a wire rack on your baking sheet because elevating chicken allows hot air circulation underneath, preventing steam accumulation that makes bottom coating soggy.equipment
- ✓Let breaded chicken rest for 15 minutes before baking so the coating hydrates and forms stronger bonds with the protein, reducing flaking during the flip at 10 minutes.timing15 minutes
Share this recipe
Prep
15
min
Cook
20
min
Serves
4
people
Level
intermediate
Share this recipe
Panko's irregular flakes create 40% more surface area than regular breadcrumbs, explaining why Japanese coating stays crispier longer.
Crispy Chicken with Panko from the Oven
Get ready to enjoy a guilt-free version of your favorite takeout treat! This oven-baked crispy chicken, coated in crunchy panko breadcrumbs and seasoned to perfection, is not only high in protein but also bursting with flavor. Say goodbye to greasy takeout and hello to a deliciously satisfying meal that’s easy to whip up at home!
📝 Ingredients
Serves 4🥩Meat & Seafood(1)
- Chicken breast
🥛Dairy & Eggs(2)
- Egg
- Parmesan cheese
🫙Pantry Staples(3)
- Flour
- 2 tablespoons of oil (30 ml)
- Panko breadcrumbs
📦Other(1)
- Your favorite spices
👨🍳 Instructions
- 1
Heat 2 tablespoons of oil in a pan. Once heated, add panko breadcrumbs, Parmesan cheese, and your favorite spices. Toast for about 2 minutes, stirring constantly.
- 2
Take your chicken breast, cut it in half, and flatten it to be thin. First, dip the fillet in flour, then in egg, and finally coat it with the breadcrumb mixture, pressing down to ensure it sticks.
- 3
Preheat the oven to 220 degrees Celsius. Once heated, place the tray with the chicken inside. Do not add any more oil as it is not needed.
- 4
Bake for 10 minutes, then flip the chicken and bake for another 10 minutes.
💡 Pro Tips
- ✓Toast panko breadcrumbs at medium heat (285-300°F pan temperature) for exactly 2 minutes because this dehydrates the crumb surface and creates a Maillard reaction that doubles crispiness retention during baking.technique285-300°F, 2 minutes
- ✓Pound chicken to exactly ¼ inch thickness using a meat mallet because uniform thickness ensures even cooking and prevents the 165°F internal temperature from being reached unevenly, avoiding dry spots.technique¼ inch thickness
- ✓Press breadcrumb coating with 5-10 pounds of pressure for 10 seconds per side because mechanical compression creates better adhesion and reduces coating loss by up to 60% during baking.technique5-10 lbs pressure, 10 seconds
- ✓Use a wire rack on your baking sheet because elevating chicken allows hot air circulation underneath, preventing steam accumulation that makes bottom coating soggy.equipment
- ✓Let breaded chicken rest for 15 minutes before baking so the coating hydrates and forms stronger bonds with the protein, reducing flaking during the flip at 10 minutes.timing15 minutes