Cornflour creates the signature glass-like coating because its starch molecules form longer chains than regular flour when fried.
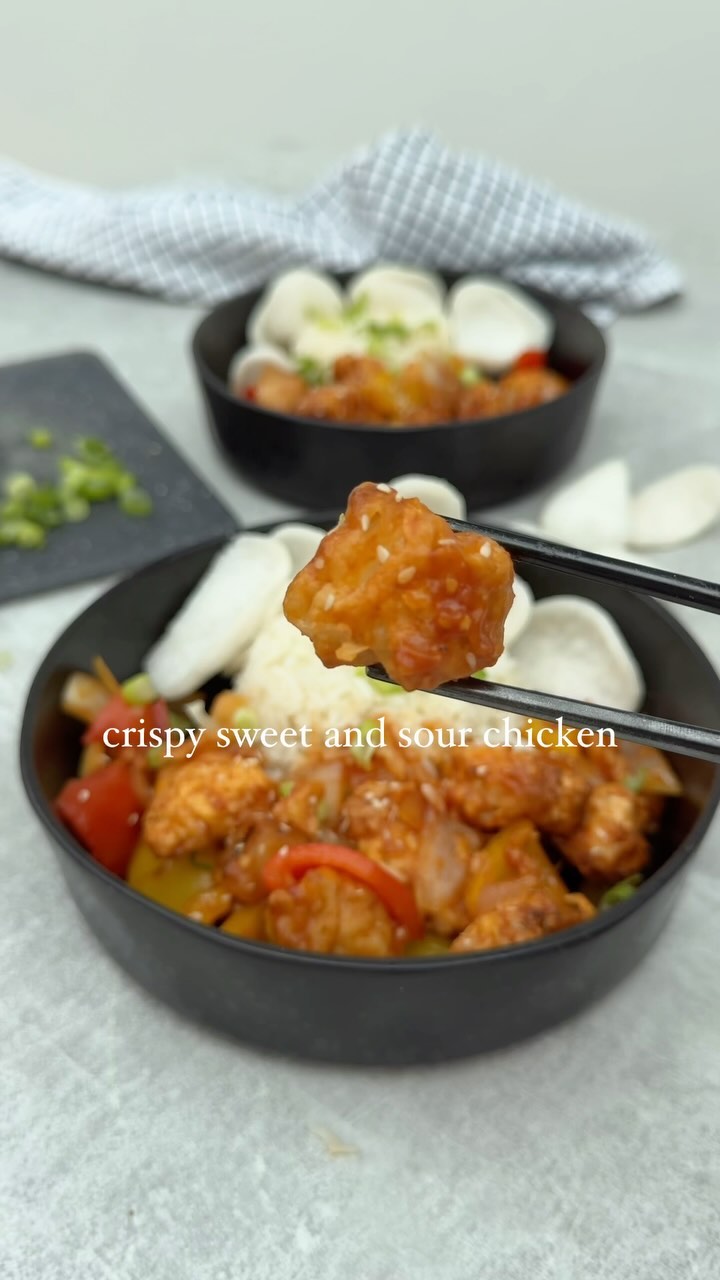
Crispy Sweet and Sour Chicken
Craving takeout without the guilt? Dive into our Crispy Sweet and Sour Chicken, a delightful homemade twist that's packed with flavor and nutrition! With just 504 calories and a whopping 36g of protein per serving, this dish features succulent chicken tossed in a tangy sauce and perfectly crisped in the oven for that satisfying crunch.
Prep
15
min
Cook
18
min
Serves
2
people
Level
beginner
The Story
This bastardized beauty emerged in 1960s American Chinese restaurants when Cantonese immigrants discovered that drowning anything in sugary ketchup made homesick GIs forget they weren't eating actual Chinese food—what started as sweet and sour pork in Guangdong Province got the full Stars and Stripes makeover with chicken, processed tomato sauce, and enough corn syrup to fuel a NASCAR race.
Regional Twist
In Hong Kong's Tsim Sha Tsui district, they ditch the ketchup entirely and build the sweet-sour sauce with black rice vinegar, rock sugar, and fermented yellow bean paste for a proper umami punch.
📝 Ingredients
Shopping List
- 200 g chicken breast
- 1 egg
- 1 tsp (5 ml) grated garlic
- 1 tsp (5 ml) sesame seeds
- 2 spring onion
- 1 white onion
Pantry Items
Amounts also listed in instructions below
- brown sugar (to taste)
- cornstarch (to taste)
- light soy sauce (to taste)
- long grain rice (to taste)
- red pepper (to taste)
- reduced sugar ketchup (to taste)
- rice vinegar (to taste)
- soy sauce (to taste)
- yellow pepper (to taste)
👨🍳 Instructions
- 1
In a bowl, add the chicken, soy sauce, and garlic. Mix well before adding in the whisked egg. Set aside.
- 2
Mix together all of the sauce ingredients and set aside.
- 3
Take each piece of chicken, shake off any excess egg before dipping into the cornflour. Ensure each piece is fully coated before shaking off any excess.
- 4
Place in the air fryer ensuring no pieces touch. Air fry for 18 minutes at 190 degrees Celsius, shaking throughout.
- 5
Cook the rice according to package instructions.
- 6
While the chicken cooks, add the onion and peppers to a frying pan. Sauté until soft.
- 7
Once soft and a few minutes remaining on the chicken, add the sauce to the pan. Add 80ml water to the pan and leave over medium heat to thicken slightly.
- 8
Add the cooked chicken to the sauce. Toss well to coat.
- 9
Serve immediately over rice with spring onion and sesame seeds.
💡 Pro Tips
- ✓Double-coat your chicken by dipping floured pieces back into the egg mixture, then cornflour again - this creates a thicker crust that stays crispier when tossed in sauce.technique
- ✓Let cornflour-coated chicken rest for 5-10 minutes before air frying so the coating hydrates and adheres better, preventing it from falling off during cooking.timing5-10 minutes
- ✓Preheat your air fryer to 190°C for 3-5 minutes before adding chicken - the immediate high heat creates better Maillard reaction and crispier exterior.equipment190°C, 3-5 minutes
- ✓Add sauce to vegetables only in the final 2-3 minutes of chicken cooking time because cornstarch-thickened sauces lose their glossy finish and can break if overcooked.timing2-3 minutes
- ✓Toss cooked chicken with sauce immediately off heat - the residual pan temperature will warm the sauce without making the crispy coating soggy from extended steam exposure.technique
Share this recipe
Prep
15
min
Cook
18
min
Serves
2
people
Level
beginner
Share this recipe
Cornflour creates the signature glass-like coating because its starch molecules form longer chains than regular flour when fried.
Crispy Sweet and Sour Chicken
Craving takeout without the guilt? Dive into our Crispy Sweet and Sour Chicken, a delightful homemade twist that's packed with flavor and nutrition! With just 504 calories and a whopping 36g of protein per serving, this dish features succulent chicken tossed in a tangy sauce and perfectly crisped in the oven for that satisfying crunch.
The Story
This bastardized beauty emerged in 1960s American Chinese restaurants when Cantonese immigrants discovered that drowning anything in sugary ketchup made homesick GIs forget they weren't eating actual Chinese food—what started as sweet and sour pork in Guangdong Province got the full Stars and Stripes makeover with chicken, processed tomato sauce, and enough corn syrup to fuel a NASCAR race.
Regional Twist
In Hong Kong's Tsim Sha Tsui district, they ditch the ketchup entirely and build the sweet-sour sauce with black rice vinegar, rock sugar, and fermented yellow bean paste for a proper umami punch.
📝 Ingredients
Shopping List
- 200 g chicken breast
- 1 egg
- 1 tsp (5 ml) grated garlic
- 1 tsp (5 ml) sesame seeds
- 2 spring onion
- 1 white onion
Pantry Items
Amounts also listed in instructions below
- brown sugar (to taste)
- cornstarch (to taste)
- light soy sauce (to taste)
- long grain rice (to taste)
- red pepper (to taste)
- reduced sugar ketchup (to taste)
- rice vinegar (to taste)
- soy sauce (to taste)
- yellow pepper (to taste)
👨🍳 Instructions
- 1
In a bowl, add the chicken, soy sauce, and garlic. Mix well before adding in the whisked egg. Set aside.
- 2
Mix together all of the sauce ingredients and set aside.
- 3
Take each piece of chicken, shake off any excess egg before dipping into the cornflour. Ensure each piece is fully coated before shaking off any excess.
- 4
Place in the air fryer ensuring no pieces touch. Air fry for 18 minutes at 190 degrees Celsius, shaking throughout.
- 5
Cook the rice according to package instructions.
- 6
While the chicken cooks, add the onion and peppers to a frying pan. Sauté until soft.
- 7
Once soft and a few minutes remaining on the chicken, add the sauce to the pan. Add 80ml water to the pan and leave over medium heat to thicken slightly.
- 8
Add the cooked chicken to the sauce. Toss well to coat.
- 9
Serve immediately over rice with spring onion and sesame seeds.
💡 Pro Tips
- ✓Double-coat your chicken by dipping floured pieces back into the egg mixture, then cornflour again - this creates a thicker crust that stays crispier when tossed in sauce.technique
- ✓Let cornflour-coated chicken rest for 5-10 minutes before air frying so the coating hydrates and adheres better, preventing it from falling off during cooking.timing5-10 minutes
- ✓Preheat your air fryer to 190°C for 3-5 minutes before adding chicken - the immediate high heat creates better Maillard reaction and crispier exterior.equipment190°C, 3-5 minutes
- ✓Add sauce to vegetables only in the final 2-3 minutes of chicken cooking time because cornstarch-thickened sauces lose their glossy finish and can break if overcooked.timing2-3 minutes
- ✓Toss cooked chicken with sauce immediately off heat - the residual pan temperature will warm the sauce without making the crispy coating soggy from extended steam exposure.technique